Understanding RenderCV
This guide walks you through how RenderCV works, explaining each step and the tools we use.
The Core Workflow
RenderCV does more than this (Markdown, HTML, PNG outputs, watching files, etc.), but at its core, what happens is:
flowchart LR
    A[YAML file] --> B[Typst file]
    B --> C[PDF]
Read a YAML file, generate a Typst file, compile it to PDF. Everything else is built on top of this foundation.
What is Typst?
Before we dive into the steps, let's understand what Typst is.
Typst is a computer language. Just like Python, HTML, or JavaScript. You write Typst code to describe what a page should look like and what content it contains. You save it as a text file (.typ extension). When you compile a *.typ file with Typst compiler, you get a PDF.
RenderCV generates a Typst file from your YAML and compiles it with the Typst compiler to produce your CV as a PDF.
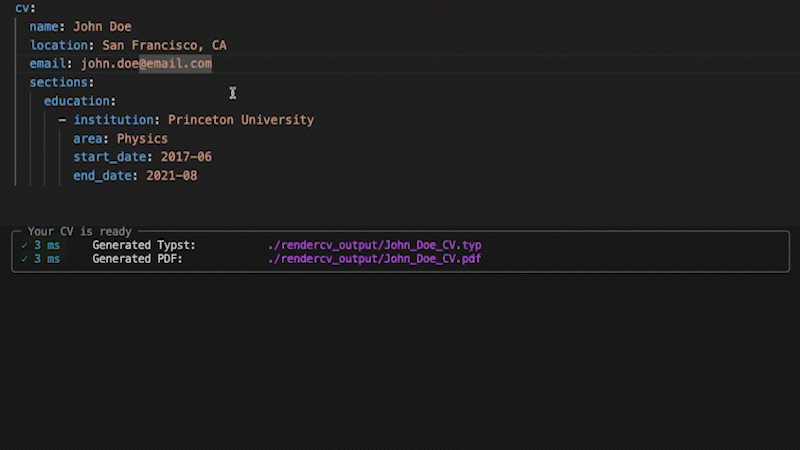
Step 1: Reading the YAML File
When a user gives us a YAML file like this:
cv:
  name: John Doe
  location: San Francisco, CA
  sections:
    education:
      - institution: MIT
        degree: PhD
        start_date: 2020-09
        end_date: 2024-05
We need to:
- Parse the YAML into Python dictionaries
- Validate the data (Does
start_datecome beforeend_date? Isnameactually provided and is it a string?)
ruamel.yaml: YAML Parser
Python doesn't have a built-in YAML library. To read YAML files, you need a library. We use ruamel.yaml, one of the best YAML parsers available.
What does it do? Simple: converts YAML text into Python dictionaries.
YAML file (cv.yaml):
cv:
  name: John Doe
  location: San Francisco, CA
  sections:
    education:
      - institution: MIT
        degree: PhD
        start_date: 2020-09
After parsing with ruamel.yaml:
from ruamel.yaml import YAML

yaml = YAML()
data = yaml.load(open("cv.yaml"))

# Now data is a Python dictionary:
{
    "cv": {
        "name": "John Doe",
        "location": "San Francisco, CA",
        "sections": {
            "education": [
                {
                    "institution": "MIT",
                    "degree": "PhD",
                    "start_date": "2020-09"
                }
            ]
        }
    }
}

# You can access it like any Python dict:
data["cv"]["name"]  # "John Doe"
data["cv"]["sections"]["education"][0]["institution"]  # "MIT"
That's it. YAML text becomes a Python dictionary we can work with.
ruamel.yaml is being called in src/rendercv/schema/yaml_reader.py.
pydantic: Python Dictionary Validator
Now we have a dictionary. We need to validate it. Without a library, you'd write:
if "name" not in data["cv"]:
    raise ValueError("Missing 'name' field")

if not isinstance(data["cv"]["name"], str):
    raise ValueError("name must be a string")

if "sections" in data["cv"]:
    for section_name, entries in data["cv"]["sections"].items():
        for entry in entries:
            if "start_date" in entry and "end_date" in entry:
                # Parse dates, compare them...
                # This is already hundreds of lines and we're barely started
With pydantic, we can define the structure once:
from pydantic import BaseModel
from datetime import date as Date

class Education(BaseModel):
    institution: str
    start_date: Date
    end_date: Date

    @pydantic.model_validator(mode="after")
    def check_dates(self):
        if self.start_date > self.end_date:
            raise ValueError("start_date cannot be after end_date")
        return self

class Cv(BaseModel):
    name: str
    location: str | None = None
    education: list[Education]
Then validate:
# This dictionary (from ruamel.yaml):
data = {
    "name": "John Doe",
    "location": "San Francisco",
    "education": [
        {
            "institution": "MIT",
            "start_date": "2020-09",
            "end_date": "2024-05"
        }
    ]
}

# Becomes this validated object:
cv = Cv.model_validate(data)

# Now you have clean, validated objects:
cv.name  # "John Doe"
cv.education[0].institution  # "MIT"
cv.education[0].start_date  # "2020-09", guaranteed dates are valid
That's the power. Dictionary goes in, pydantic checks everything, clean Python object comes out.
RenderCV's entire data model is pydantic models all the way down:
class RenderCVModel(BaseModel):
    cv: Cv              # ← pydantic model
    design: Design      # ← pydantic model
    locale: Locale      # ← pydantic model
    settings: Settings  # ← pydantic model
Each field is another pydantic model. Cv contains more pydantic models like EducationEntry, ExperienceEntry, etc. It's nested validation: when you validate RenderCVModel, pydantic automatically validates every nested model too. One model_validate() call checks the entire structure.
See src/rendercv/schema/models/rendercv_model.py for the top-level model.
Step 2: Generating the Typst File
Now we need to generate a Typst file:
You could try string concatenation:
typst = f"= {cv.name}\n"
if cv.location:
    typst += f"{cv.location}\n"
typst += "\n"

for section_title, entries in cv.sections.items():
    typst += f"== {section_title}\n"
    for entry in entries:
        typst += f"#strong[{entry.institution}]"
        # What about optional fields? Spacing? Line breaks?
        # Multiple themes with different layouts?
        # This is impossible to maintain!
This doesn't work. You're building hundreds of lines of string concatenation logic, handling conditionals, managing whitespace. It's unworkable.
This is why templating engines were invented. When you need to programmatically generate complex text files, you need templates.
jinja2: Templating Engine
jinja2 is the most famous templating engine for Python.
Template file (Header.j2.typ):
= {{ cv.name }}
{% if cv.location %}
{{ cv.location }}
{% endif %}

{% if cv.email %}
#link("mailto:{{ cv.email }}")
{% endif %}
Python code:
Result:
Clean separation: templates define layout, Python code provides data. Users can override templates to customize their CV without touching Python code.
Typst templates live in src/rendercv/renderer/templater/templates/typst/.
jinja2 is being called in src/rendercv/renderer/templater/templater.py.
markdown: Markdown to Typst
Users want to write Markdown in their YAML:
highlights:
  - "**Published** [3 papers](https://example.com) on neural networks"
  - "Collaborated with *Professor Smith*"
But Typst doesn't understand **bold** or [links](url). We need Typst syntax: #strong[bold] and #link("url")[text].
We use the markdown library. It parses Markdown into an XML tree. Then we walk the tree and convert each element to Typst:
match element.tag:
    case "strong":
        return f"#strong[{content}]"
    case "em":
        return f"#emph[{content}]"
    case "a":
        href = element.get("href")
        return f'#link("{href}")[{content}]'
Result: #strong[Published] #link("https://example.com")[3 papers]
See src/rendercv/renderer/templater/markdown_parser.py. The markdown_to_typst() function does this conversion.
Step 3: Compiling to PDF
typst: Typst Compiler
typst library is the Python bindings for the Typst compiler.
Done. Typst file has been compiled to PDF.
typst is being called in src/rendercv/renderer/pdf_png.py.
The Complete Pipeline
When you run rendercv render cv.yaml:
- Parse -
ruamel.yamlreads YAML → Python dict - Validate -
pydanticvalidates dict →RenderCVModelobject - Generate -
jinja2renders templates with data → Typst file - Compile -
typstcompiles Typst → PDF
Everything else (Markdown support, watch mode, PNG output, HTML export) builds on this core.
Learn More
src/rendercv/cli/render_command/run_rendercv.py: The complete flowsrc/rendercv/schema/models/rendercv_model.py: The top-level Pydantic modelsrc/rendercv/renderer/templater/templater.py: Template rendering